Debugging Sitecore Marketing Automation UI

The previous post detailed how you can debug the server side aspects of the Marketing Automation agent. If you start experimenting with richer functionality, I’m sure you’ll soon want to create your own custom activities and UI’s.

Sitecore provide a good description of doing this in their documentation.

Adding custom fields to the UI

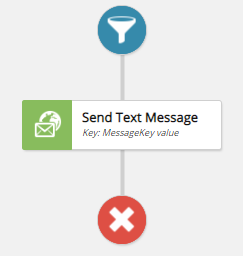
In my demo activity, I needed to include a MessageKey that would be passed through to the backend engine. Getting the field to show was relatively easy if you follow the example. I’d also recommend checking out this repo.

The problem I hit was getting the MessageKey value to render correctly in the UI when I opened a plan for the second time – rather than seeing the Key displayed as expected, you’d see an empty block.

Missing key value
Showing the key value

Why was this?

Well, it turns out the MessageKey != messageKey . For some reason, when you write your custom typescript activity, you need to reference ‘this.editorParams.messageKey’, not ‘this.editorParams.MessageKey’. Note the capital, or lack of, M.

Missing bits of Sitecore

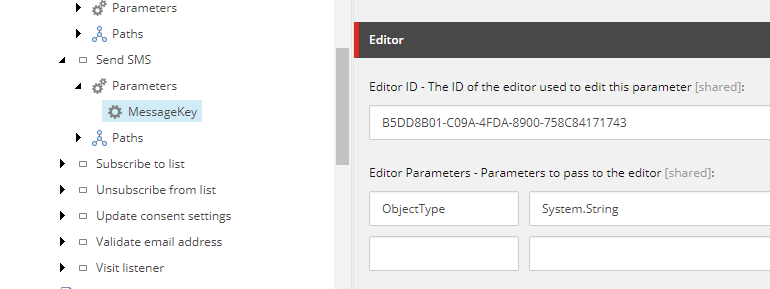
One thing the docs doesn’t mention is when you create your custom parameter within the Sitecore tree, you need to set a couple additional fields (Editor ID, Editor Parameters). Have a look at some existing ones for more details.

Debugging the UI

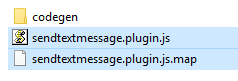
How did I spot the issue with the M? Once you’ve built your plugin js (npm run dev) you get a minified js file to deploy. Alongside this you will also get a sourcemap file:

If you copy this to the same folder as your deployed plugin, you can then do some clever things in chrome:

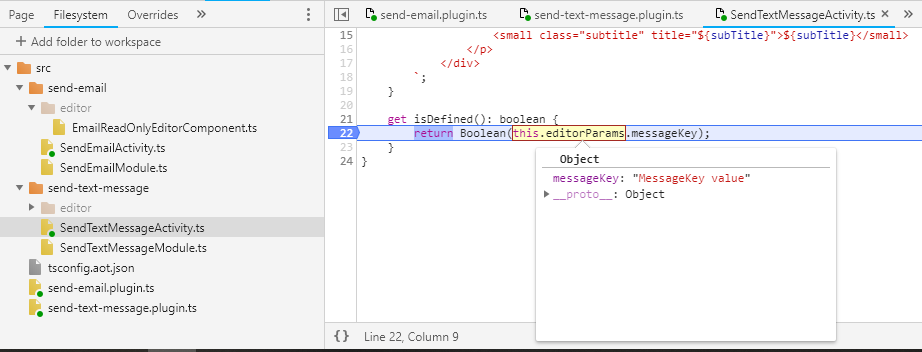
In order for this to work you need to:

  • Deploy the sourcemap file as per above
  • Add the folder where the original TS files live into chrome
    • In the diagram above => Filesystem => Add folder to workspace 

Happy debugging 🙂

Debugging Sitecore Marketing automation

Here are a few tips and tricks that should help if you want to start developing custom activities within the new Sitecore Marketing automation engine.

The docs

There is a pretty extensive guide on the Sitecore docs site: https://doc.sitecore.net/developers/xp/marketing-automation/activities/activity-types/create-an-activity-type.html

Alternatively have a look at these really useful 4 blog posts: https://www.brimit.com/blog/sitecore-9-custom-marketing-automation-action

Debugging your code

There are a few ways to run the engine – by default it gets installed as a windows service however if you navigate to:

{xconnectdeployment}\App_data\jobs\continuous\AutomationEngine there is an exe (maengine.exe) you can run instead. Your code deployment will involve copying dll’s from your solution into that same folder.

To debug, run the console app and then attach to the maengine process within visual studio. When the plans run, and your activity is triggered, you should see breakpoints kick in. 

If you want to make attaching to the engine simpler, in Visual Studio ‘Add existing project‘ => Select the maengine.exe on disk => Right click ‘Debug => Start new instance

Some developer tips

If you are getting started and can’t seem to get your code to run, try setting up a very simple plan with a loose trigger. An example trigger, where the month is October

Also, check the custom config is in place to link your custom code with the GUID of the new activity within Sitecore. This needs to live in 
{xconnectdeployment}\App_data\jobs\continuous \AutomationEngine\App_Data\Config\sitecore\PatchFolder  – you can call the PatchFolder what you need.

And finally, if you want to see what Sitecore is storing under the hood when you save a plan, they live in /sitecore/system/Marketing Control Panel/Automation Plans. You can always un-bucket the folder to see each plan.